Groups & Permissions
Overview
Groups in IoTBreeze provide a structured way to manage user access and device visibility. By assigning users, things and thing types to groups, administrators can control which devices and features are accessible to them.
Groups are hierarchical, meaning permissions can be inherited from parent groups, ensuring a scalable and organized access management system.
This guide explains how to create groups, assign users and resources (including things, thing types and event types) and understand the hierarchy structure.
Creating a Group
Navigating to Groups
To create a new group:
- Go to Administration → Groups in the sidebar.
- You will see the Group Hierarchy list on the left side of the screen.
- Click the "+" button at the top of the list to add a new group.
Group Creation Form
When creating a new group, you need to define its key attributes.
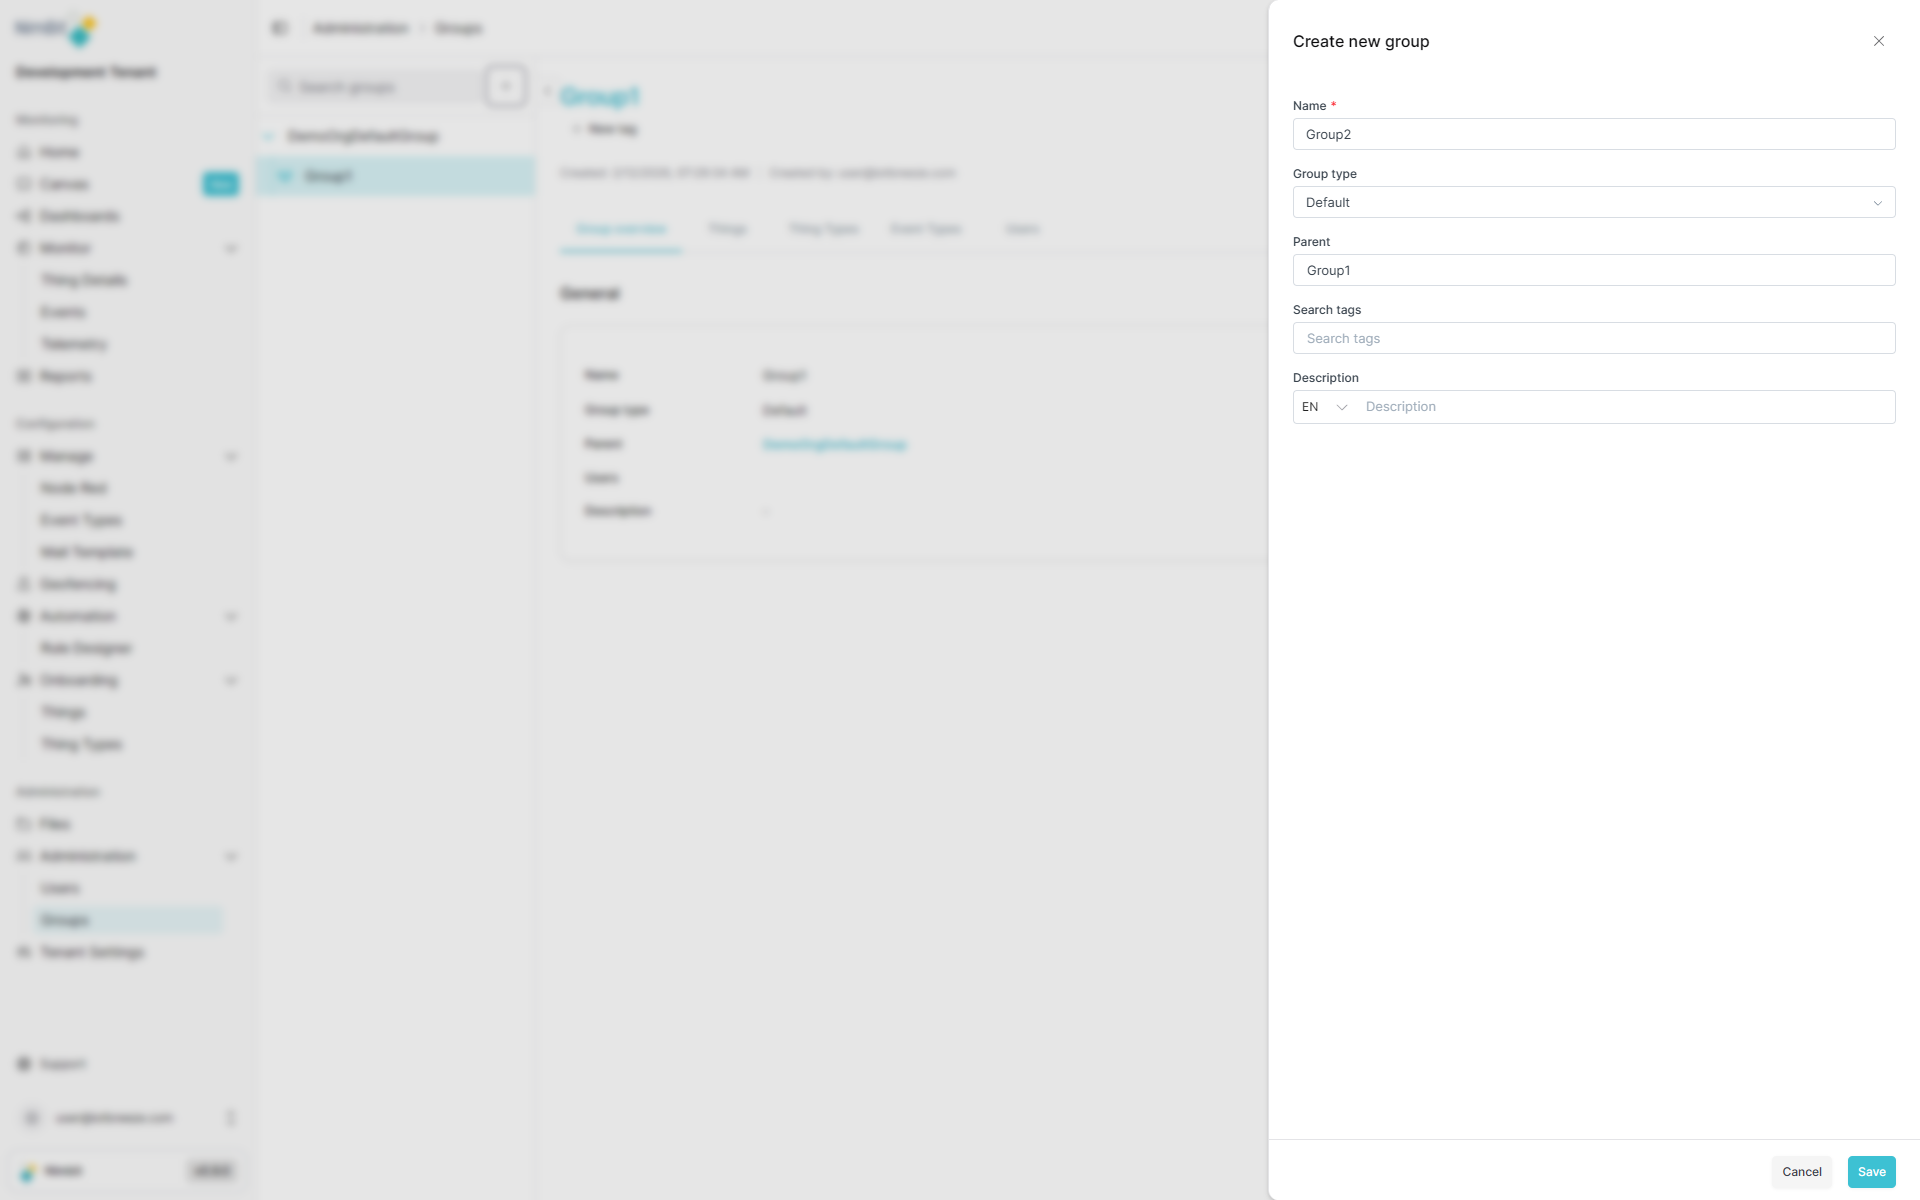
| Field | Required | Description |
|---|---|---|
| Name | ✅ Yes | A unique name for the group (no spaces, no special characters except underscore). |
| Group Type | ✅ Yes | Select either Default or Organization. |
| Parent Group | ✅ Yes | Choose an existing group as the parent (cannot be left empty). |
| Search Tags | ❌ No | Keywords to help with filtering and searching. |
| Description | ❌ No | Additional information about the group's purpose. |
Once all required fields are filled and the save button is clicked, the group is created and appears in the group hierarchy list.
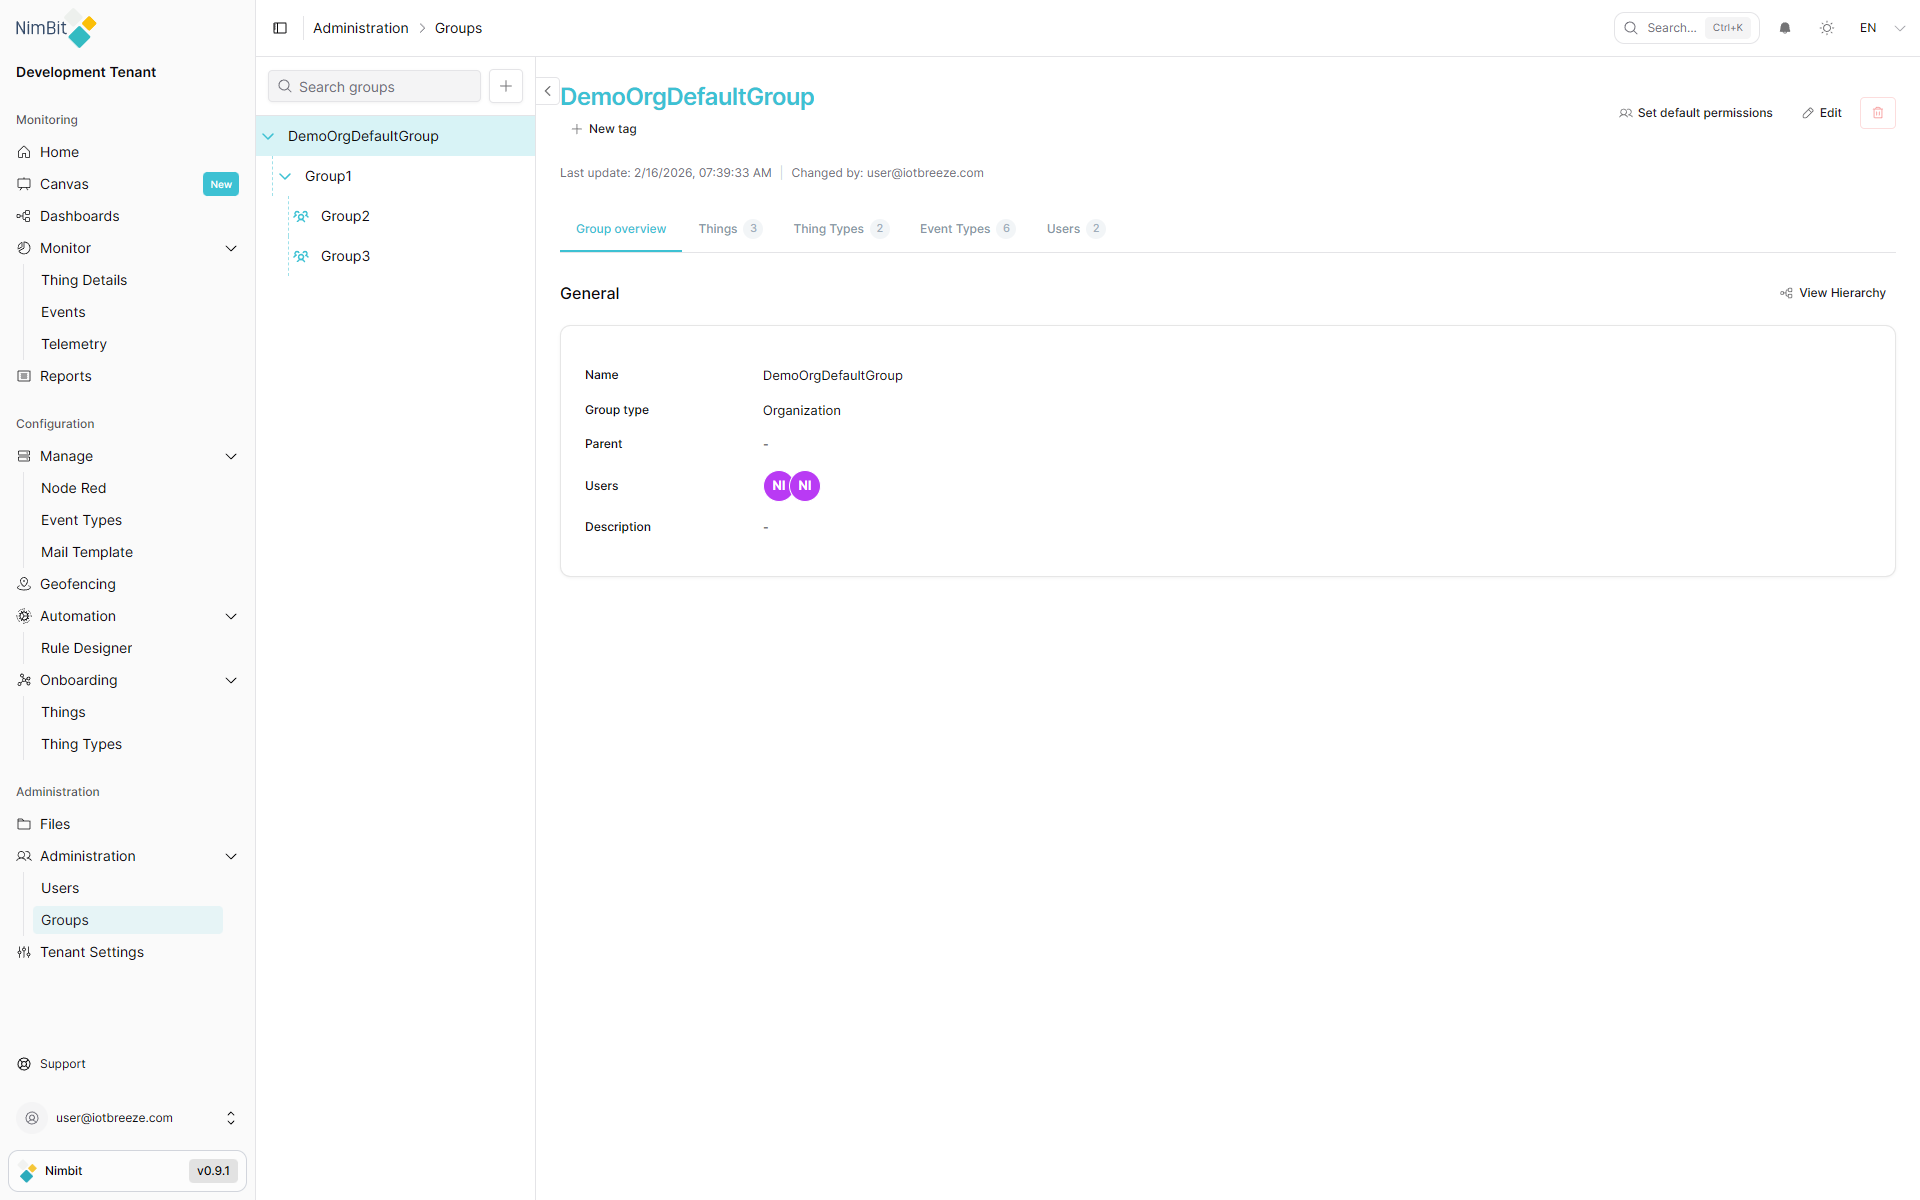
Viewing & Managing the Group Hierarchy
Group Hierarchy List
On the left side of the Groups page, you can see the Group Hierarchy. This provides an overview of all groups and their relationships.
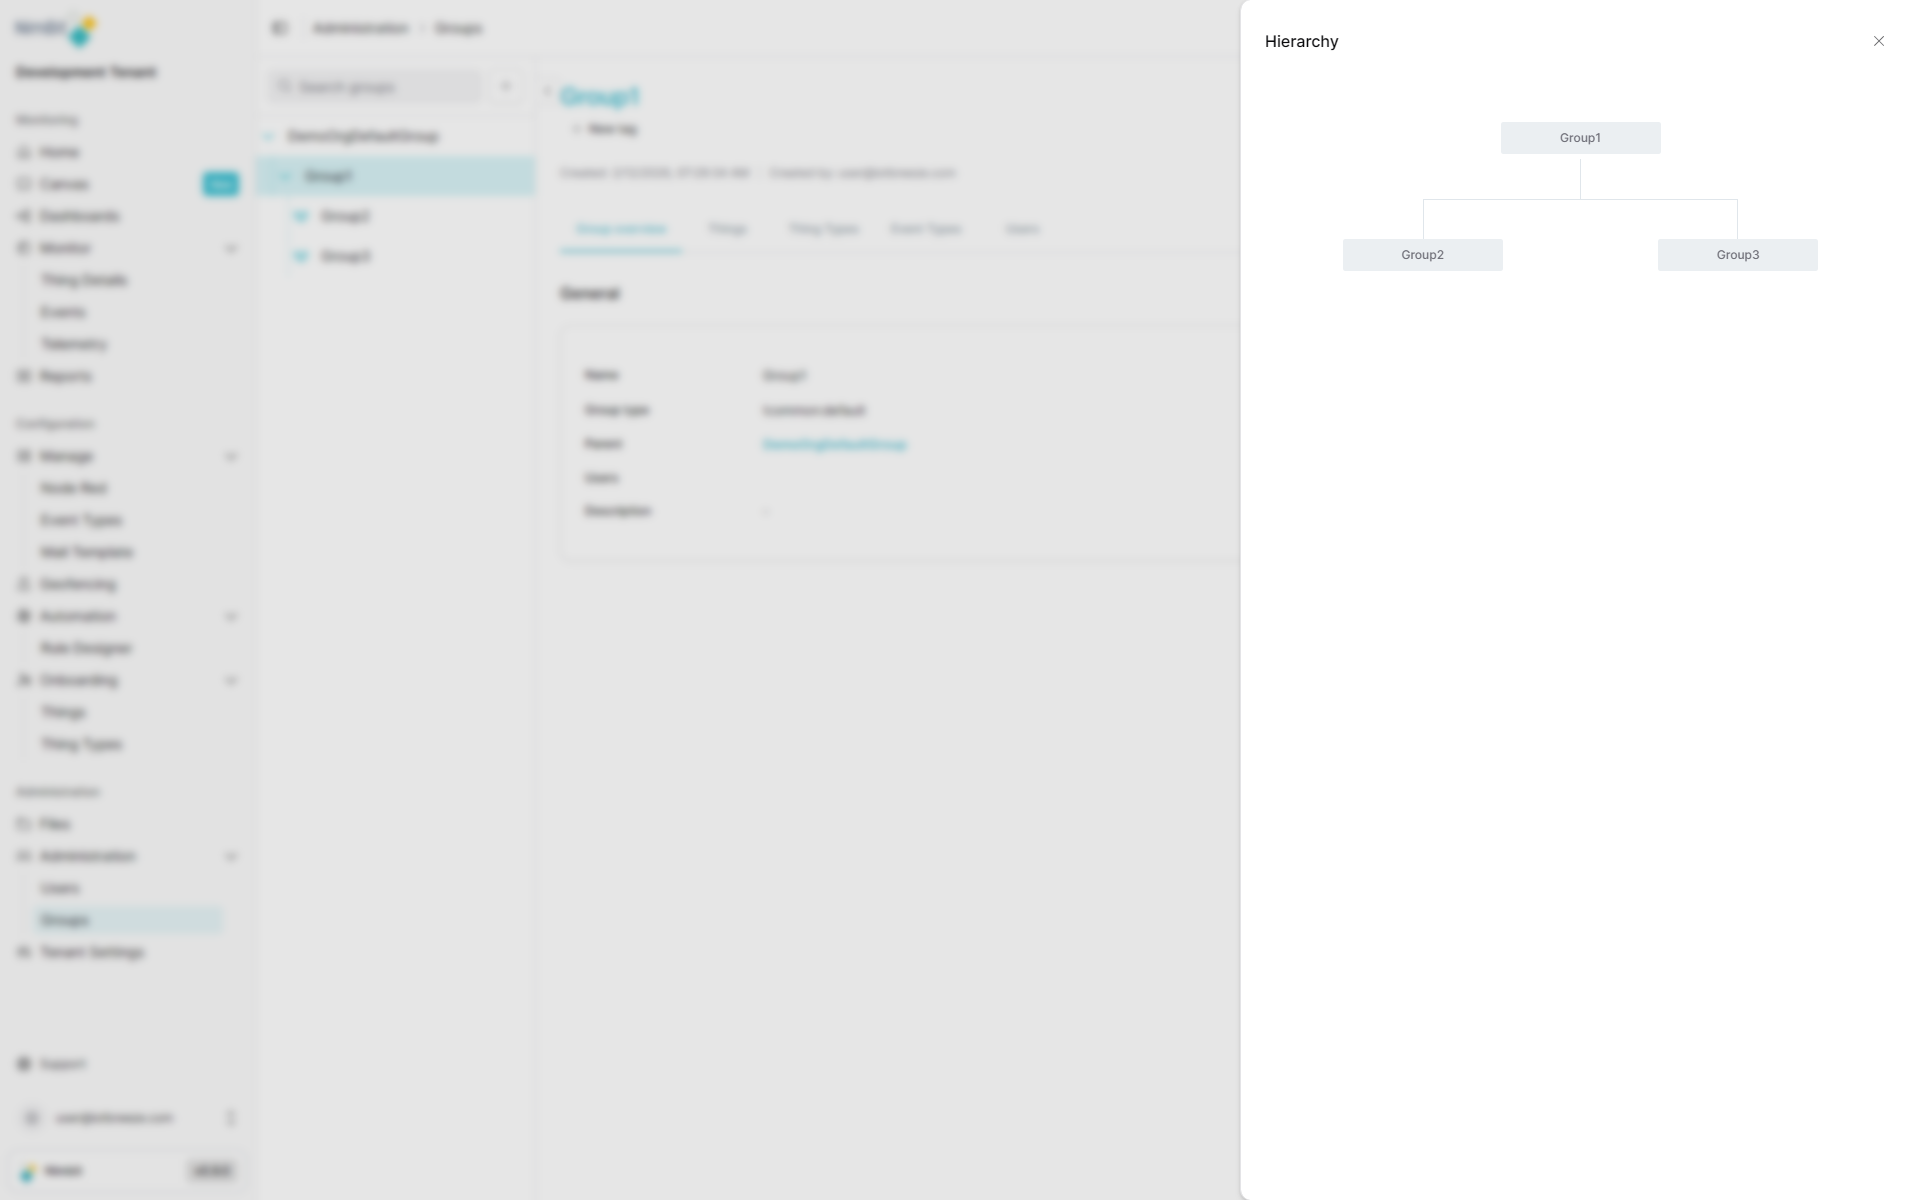
Graphical Hierarchy View
To see a more detailed visual representation of a selected group's hierarchy:
- Select a group from the list.
- Click "View Hierarchy" on the right-hand side.
This will open a graphical representation of the group and it's children.
Editing a Group
To modify a group's details:
- Navigate to Administration → Groups.
- Select a group from the list.
- Click "Edit" on the right side of the group details panel.
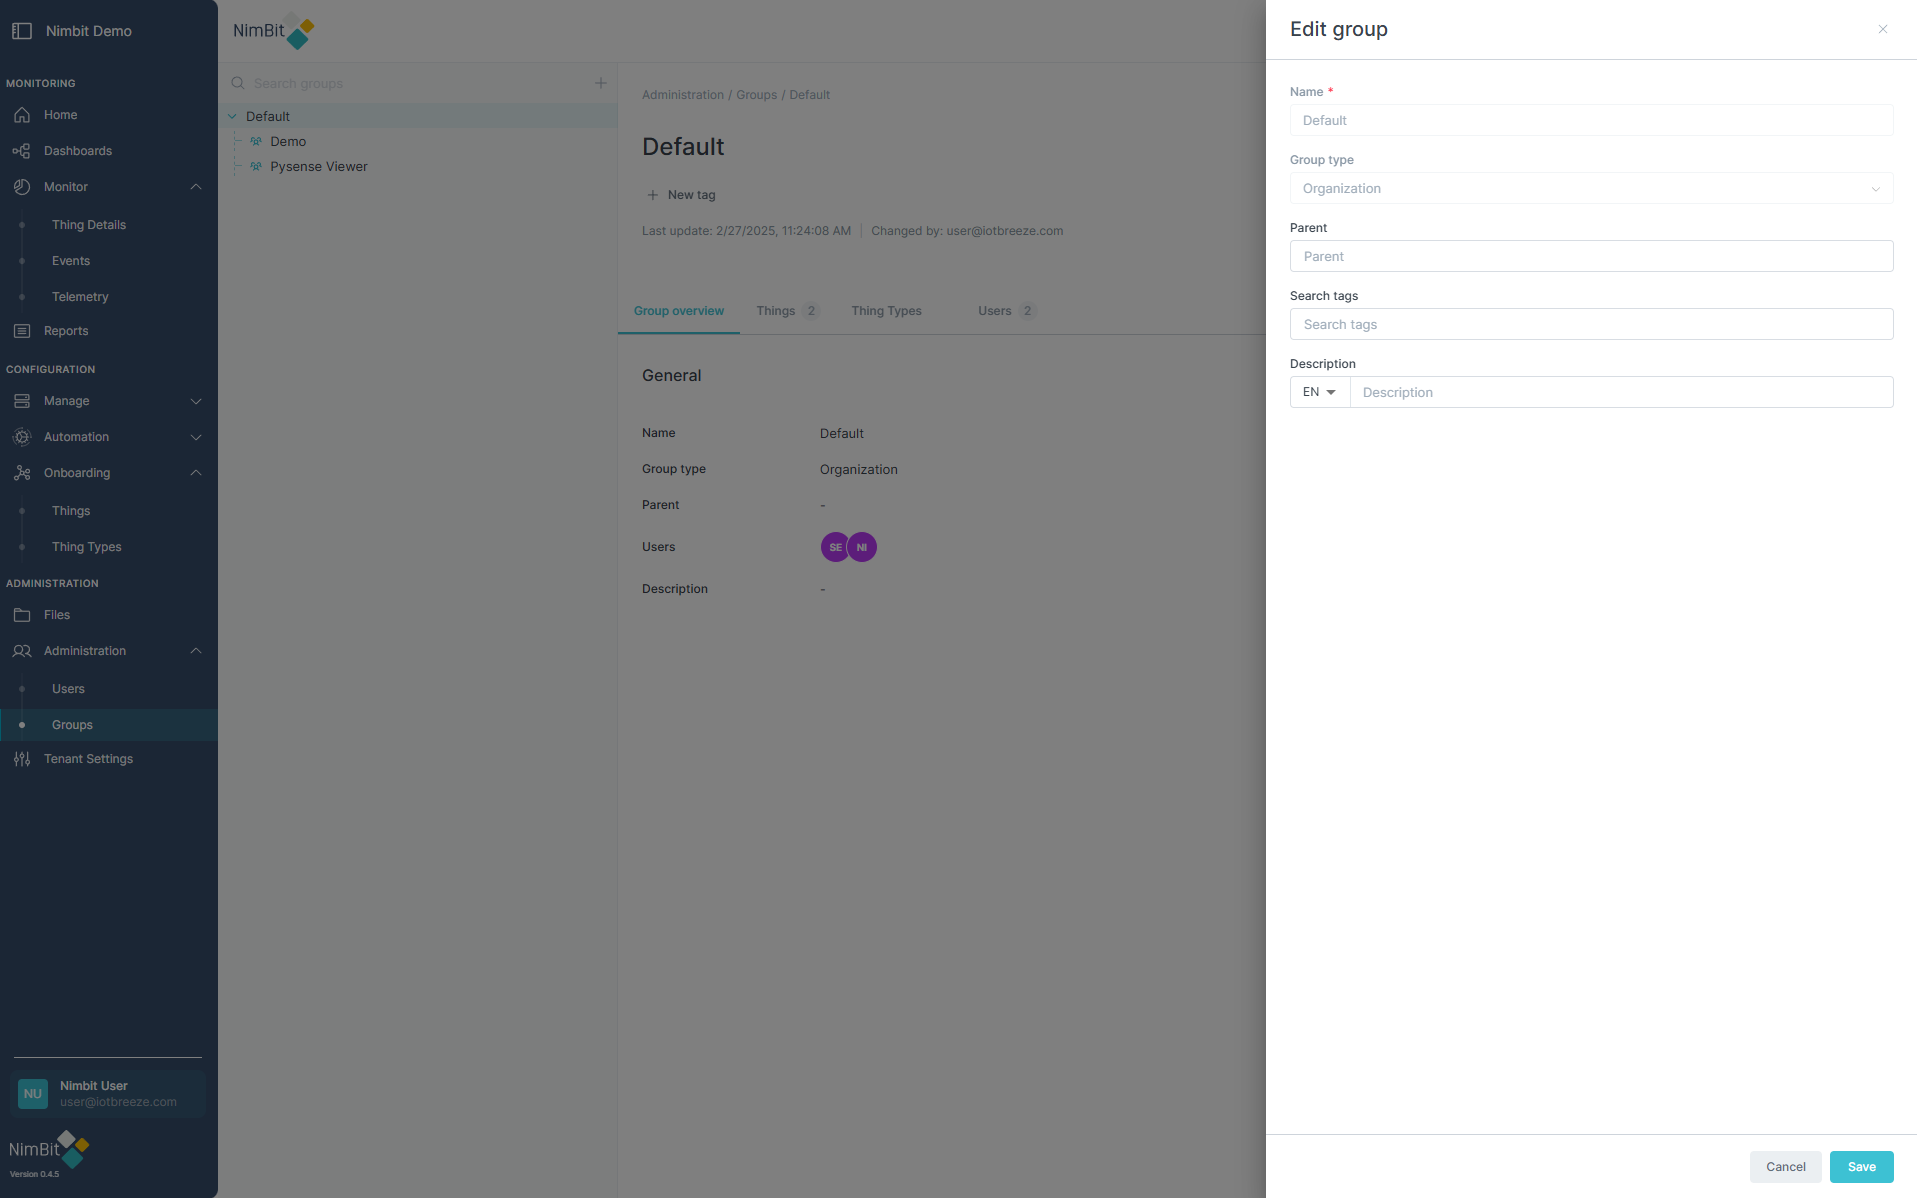
Editable Fields
| Field | Editable | Description |
|---|---|---|
| Name | ✅ Yes | Modify the group’s name. |
| Group Type | ✅ Yes | Change between Default and Organization. |
| Parent Group | ✅ Yes | Select a new parent group. |
| Search Tags | ✅ Yes | Update keywords for filtering and searching. |
| Description | ✅ Yes | Edit the group's description. |
After making changes, click "Save" to update the group.
Managing Group Members, Things, ThingTypes & Event Types
Adding Users to a Group
- Navigate to Administration → Groups.
- Select a group from the list.
- Open the Users tab and click "Add User".
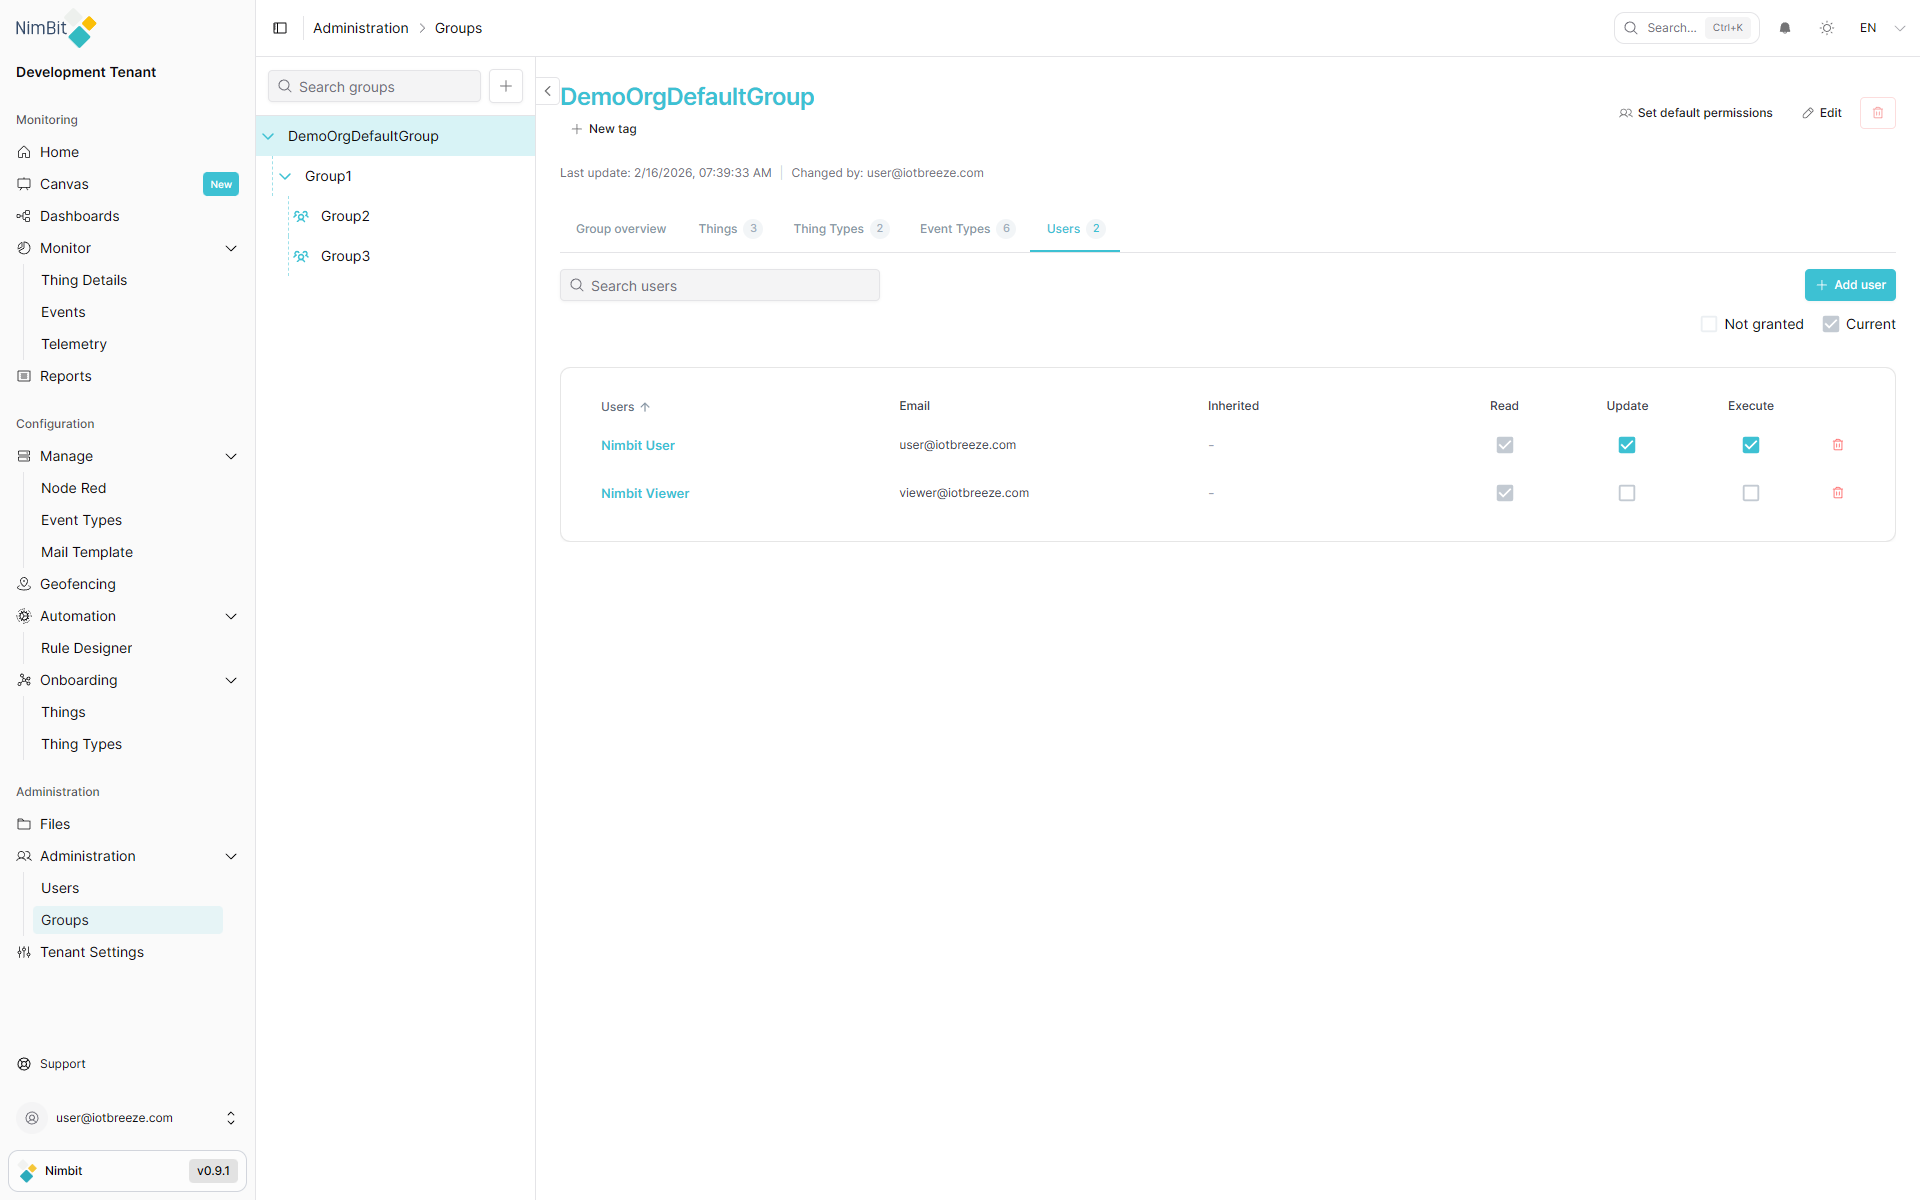
- Select a user from the dropdown list.
The user is immediately added to the group with default permissions.
Adding Things to a Group
- Navigate to Administration → Groups.
- Select a group from the list.
- Open the Things tab and click "Add Thing".
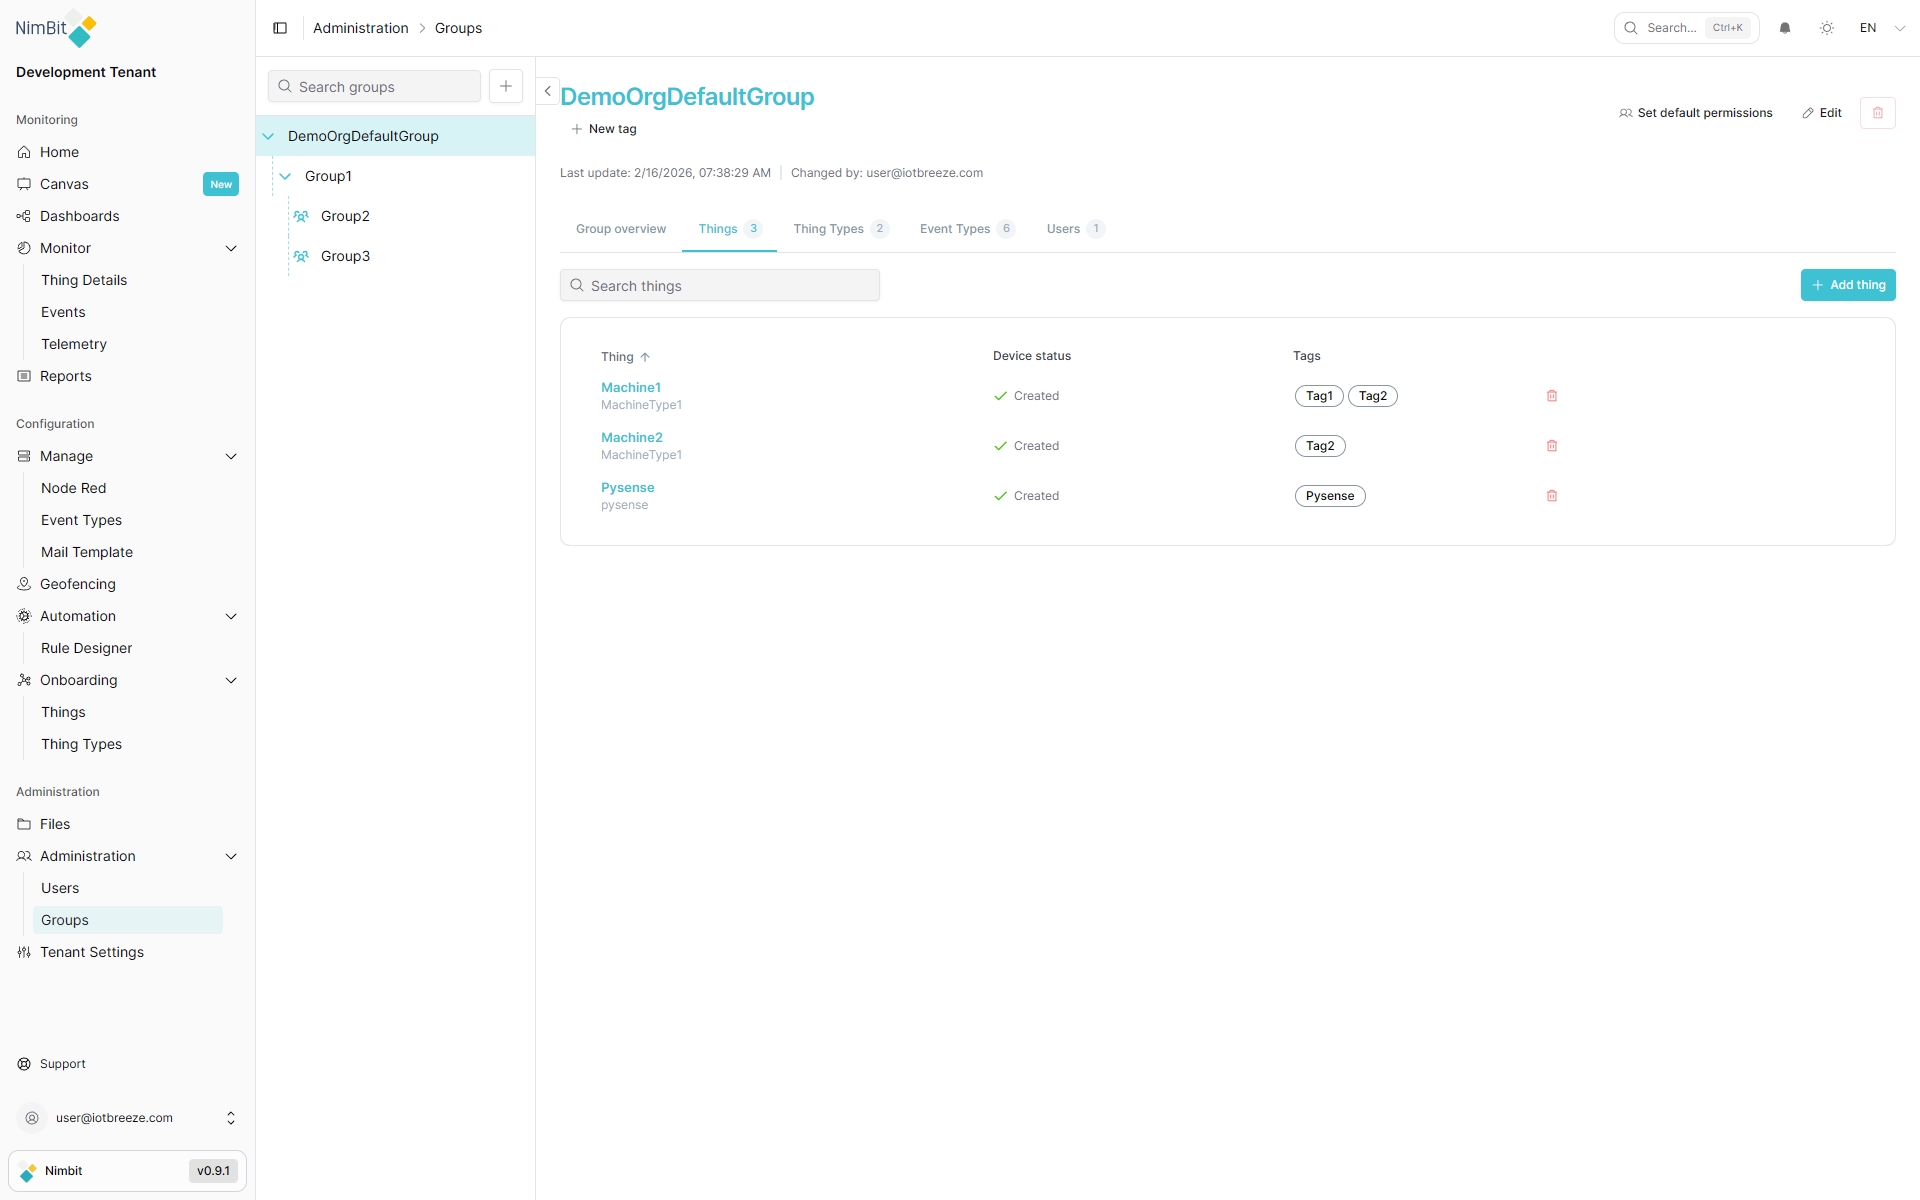
- Select a thing from the dropdown list.
The thing is immediately added to the group, making it visible and manageable by users in the group.
Adding ThingTypes to a Group
- Navigate to Administration → Groups.
- Select a group from the list.
- Open the ThingTypes tab and click "Add ThingType".

- Select a ThingType from the dropdown list.
Once added, the ThingType becomes available for use within the group, allowing users to create and manage things based on that type.
Adding Event Types to a Group
- Navigate to Administration → Groups.
- Select a group from the list.
- Open the Event Types tab and click "Add Event Type".
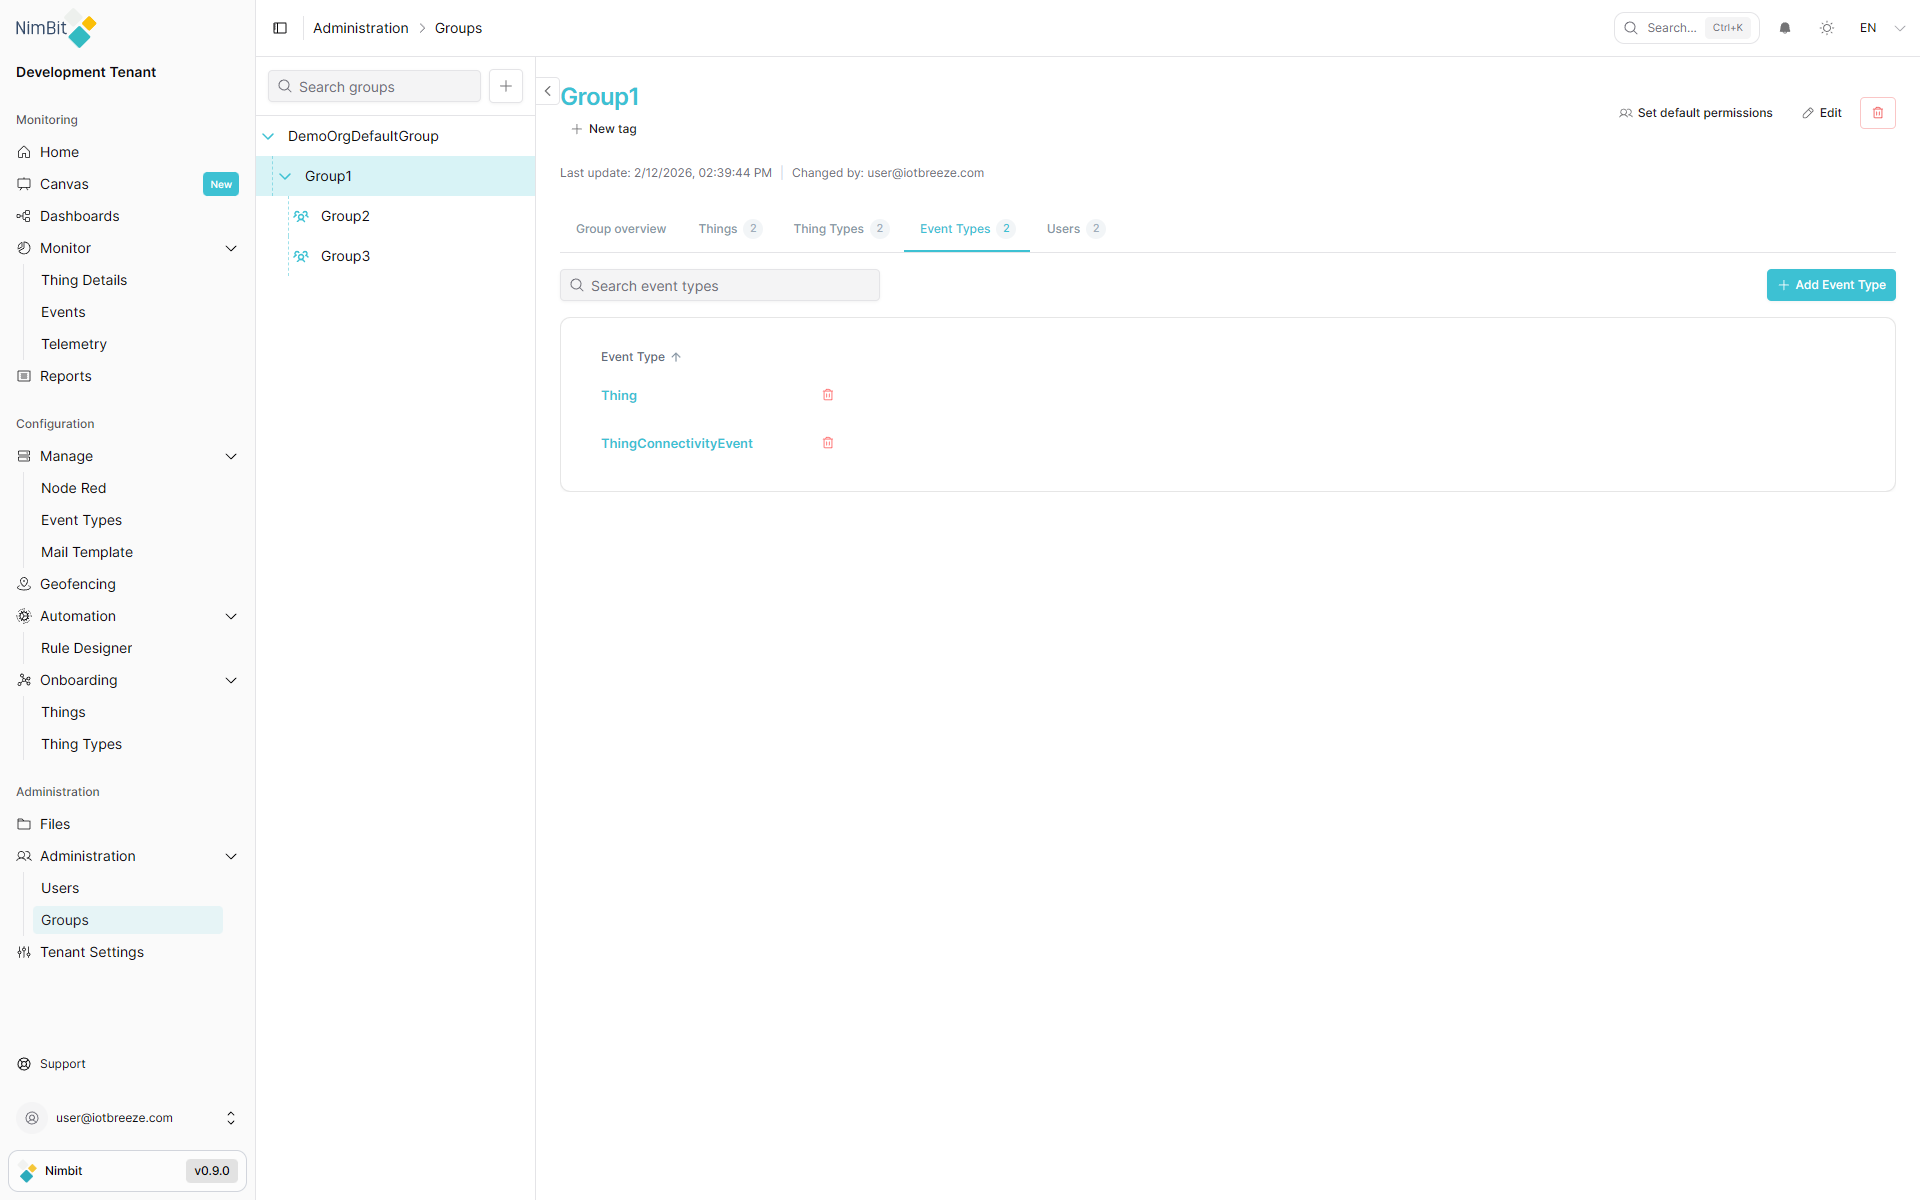
- Select an Event Type from the dropdown list.
Once added, the Event Type becomes available within the group, allowing users to configure and manage events based on that type.
Removing Users, Things, ThingTypes, or Event Types
To remove an assigned user, thing, ThingType, or Event Type:
- Navigate to the Users, Things, ThingTypes, or Event Types tab within the group.
- Click the trashcan icon next to the user, thing, ThingType, or Event Type.
This immediately removes the entity from the group, revoking access (for Things, Users and Event Types).
Understanding Default Permissions
When a user is added to a group via the Users tab, they are assigned a default set of permissions. These permissions define what actions they can perform within the group.
Default Permissions
- Read (Mandatory) - Grants viewing rights.
- Update - Allows editing existing records.
- Execute - Enables performing actions (e.g., triggering workflows).
These permissions ensure users can interact with the group's assigned things and ThingTypes effectively.
Managing Permissions
Permissions define what group members can do within IoTBreeze. Each group member can have their permissions adjusted individually.
Changing Individual User Permissions
To modify a user’s permissions:
- Open the group's Users tab.
- In the Permissions Table, adjust the checkboxes for:
- Read
- Update
- Execute
Changes take effect immediately, allowing fine-grained control over each user’s capabilities.
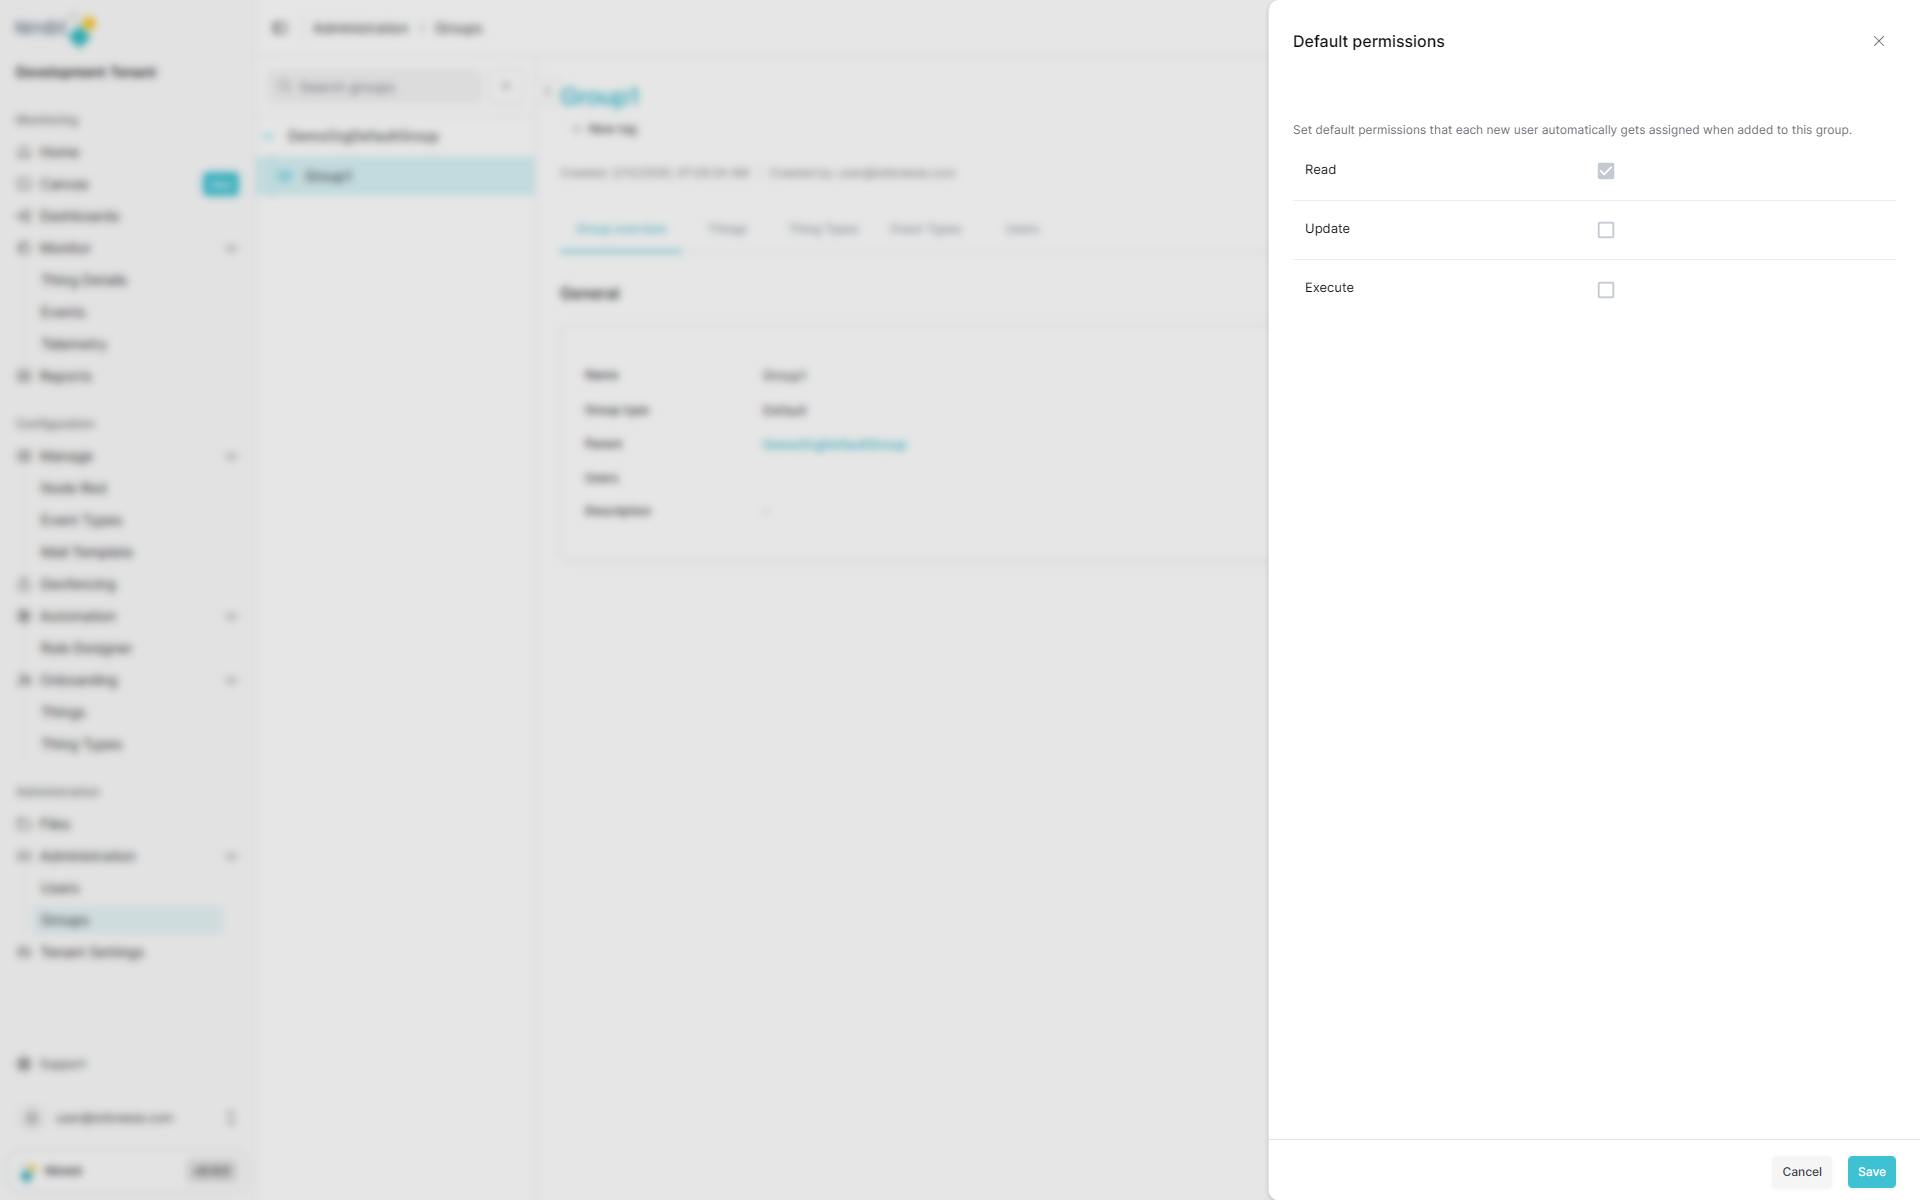
Changing Group-Wide Permissions
To adjust the default permissions that new users receive when being added to a group:
- Open the group's Set default permissions form.
- Set the permissions for Update, Execute.
- Hit Save.
Understanding Inherited Permissions
IoTBreeze's group system supports permission inheritance, allowing users to automatically receive permissions from parent groups without manually assigning them at each level.
How Permission Inheritance Works
When a user is a member of multiple groups in a hierarchy, they inherit permissions from all parent groups they belong to. This means:
- If a user is in Group A (child) and Group B (parent) and Group B grants them certain permissions, those permissions apply to Group A as well.
- Inherited permissions cannot be revoked at the child group level. They must be modified at the parent group where they were originally granted.
- Users retain the highest level of permissions across all groups they belong to in the hierarchy.
Identifying Inherited Permissions
In the Permissions Table within the Users tab, inherited permissions are visually distinguished from directly assigned permissions:
- Directly assigned permissions: Shown with a standard checkmark that can be toggled on/off.
- Inherited permissions: Displayed with a different colored checkmark indicating the permission comes from a parent group.
Example Scenario
Consider this group hierarchy:
Organization (Parent)
  └── Department A (Child)
      └── Team 1 (Grandchild)
User Sarah is a member of both:
- Organization group (with Read, Update and Execute permissions)
- Team 1 group (with only Read permission directly assigned)
When viewing Sarah's permissions in Team 1:
- Read appears as a standard checkmark (directly assigned)
- Update and Execute appear as different-colored checkmarks (inherited from Organization)
Sarah effectively has all three permissions when working in Team 1, even though only Read was directly assigned at that level.
Managing Users with Inherited Permissions
When managing user permissions:
- Inherited permissions are read-only at the child group level. They appear checked but cannot be unchecked.
- To modify inherited permissions, navigate to the parent group where they were originally granted.
- You can still add additional permissions at the child group level that are not inherited.
This inheritance model ensures consistent access control while reducing administrative overhead and maintaining security policies across the organizational hierarchy.
Deleting a Group
To delete a group:
- Go to Administration → Groups.
- Click the trashcan icon next to the group.
- Confirm the deletion.
⚠️ Warning: Deleting a group removes all its assigned permissions and user access.